
PiCy - Raspberry Pi Cyborg
PiCy, the Pi Cyborg, is our introduction into the world of making your own robots!
PiCy is a fully autonomous robot, code for which is available here.
However to start we clearly need a robot to work with. This page is for making your own customised robot.
If you are looking for the PiCy Kit (PiCyPack) it's available here

You could equally use another material like wood, but we think acrylic goes well with the Raspberry Pi, and it is easy enough to work with.
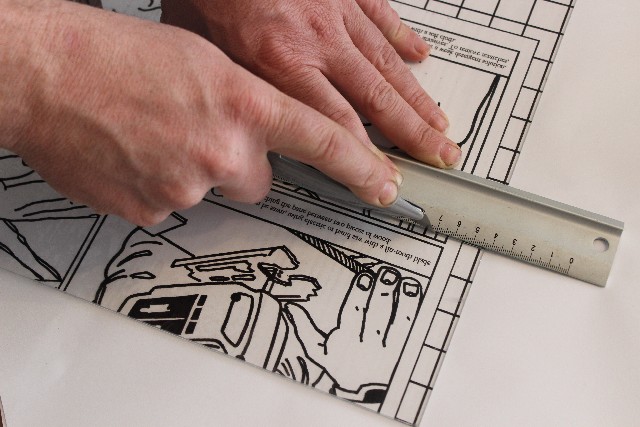
You will need to cut a rectangular section of 70mm x 100mm from your acrylic sheet, this will be where everything mounts to.
Cut it out carefully with a sharp craft knife.
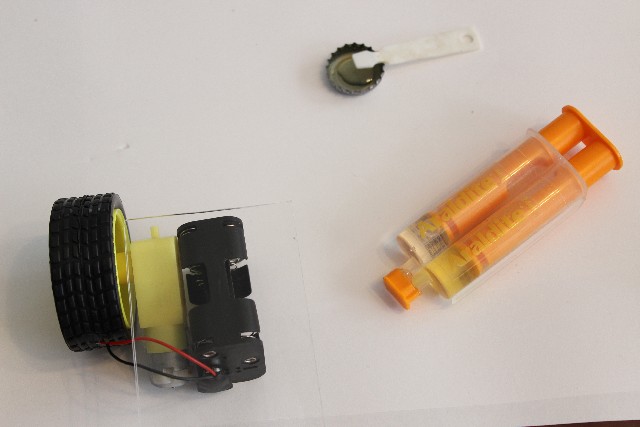
In order to mount everything together we will use a good glue, like a two part epoxy resin.
You may also want an improvised table or clamp to hold things in place whilst gluing.
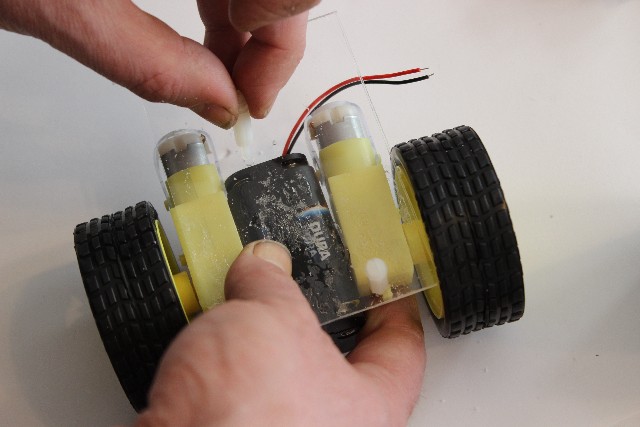
Glue one of the motors to the base, then glue in the battery pack (you may need to insert some batteries before gluing depending on your battery pack).
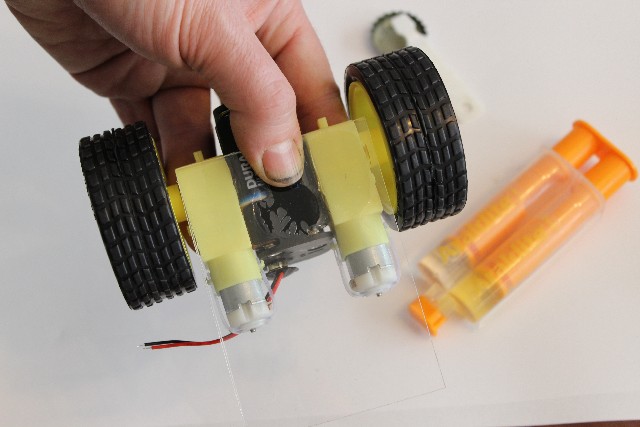
Glue the second motor onto the other side, making sure it is all aligned straight.
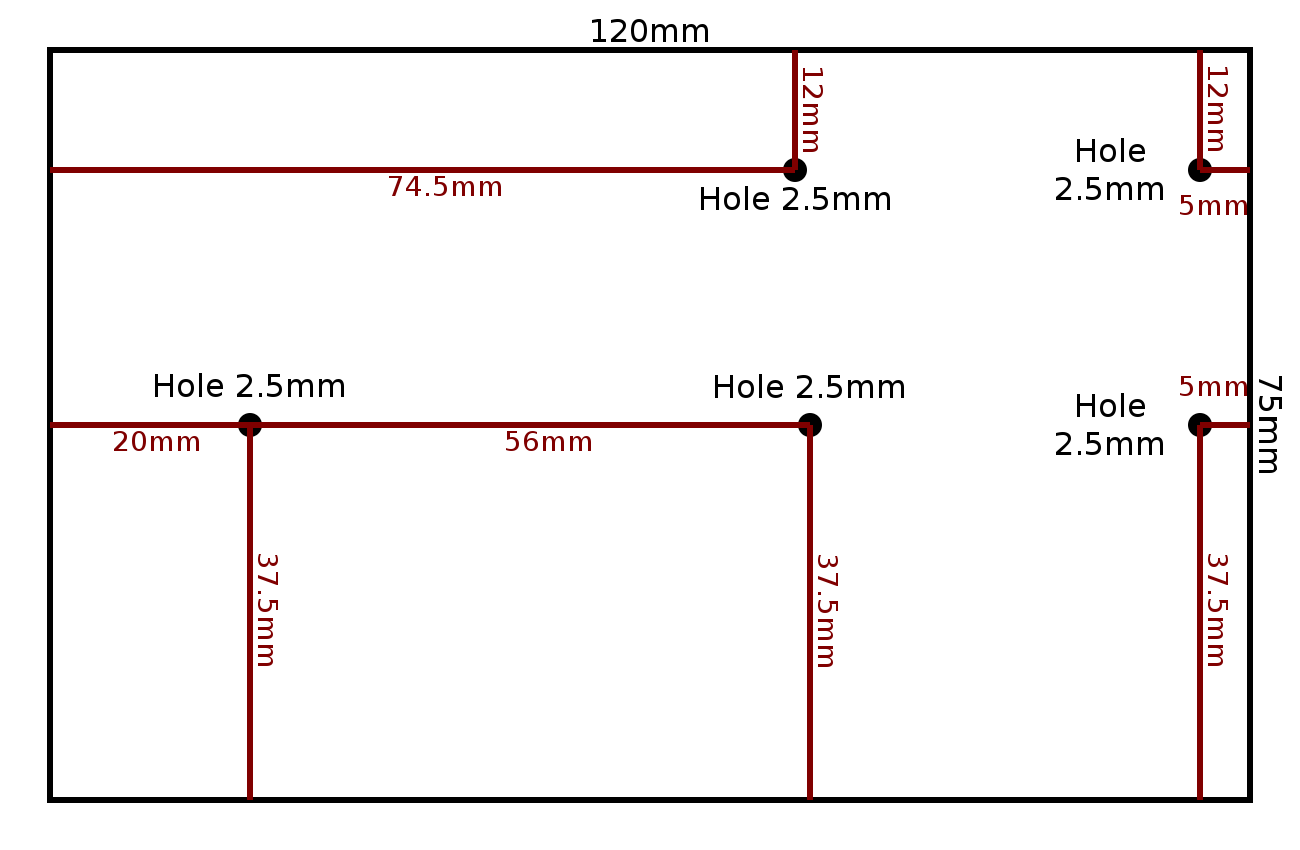
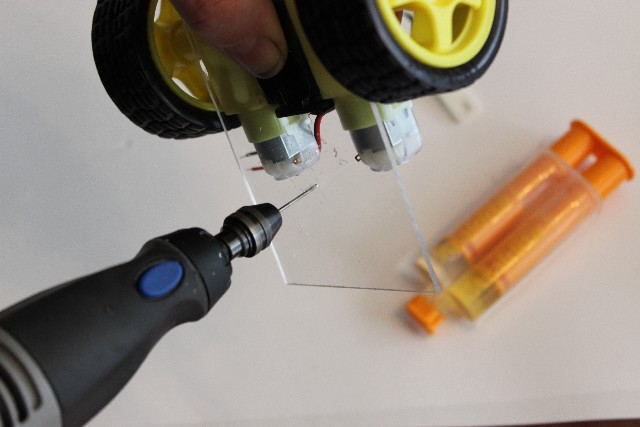
Once it has all dried it is time to drill the holes for:
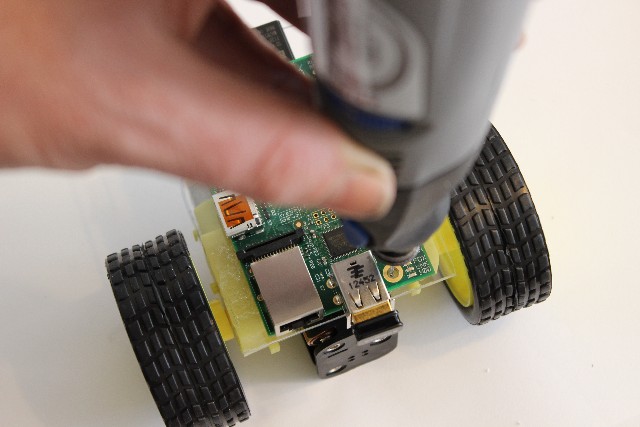
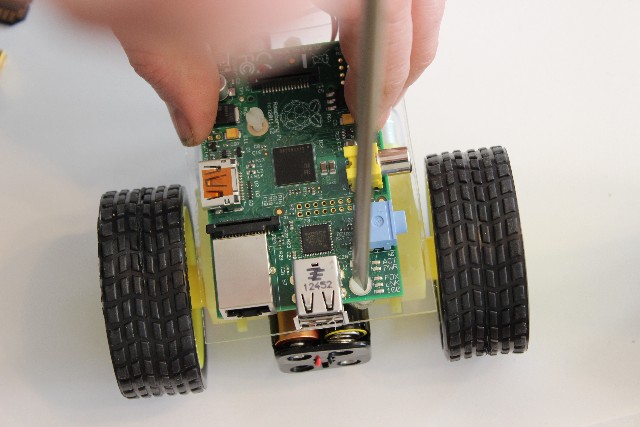
Drill in holes for Raspberry Pi mounting posts, if you have a Rev 1 Raspberry Pi you will probably need to use double sided tape instead.
Wire in the PicoBorg according to the following wiring diagram. If you are powering the Pi from the 4xAA battery pack, you will need a regulator and to solder the output of the regulator to pin2 on the Picoborg
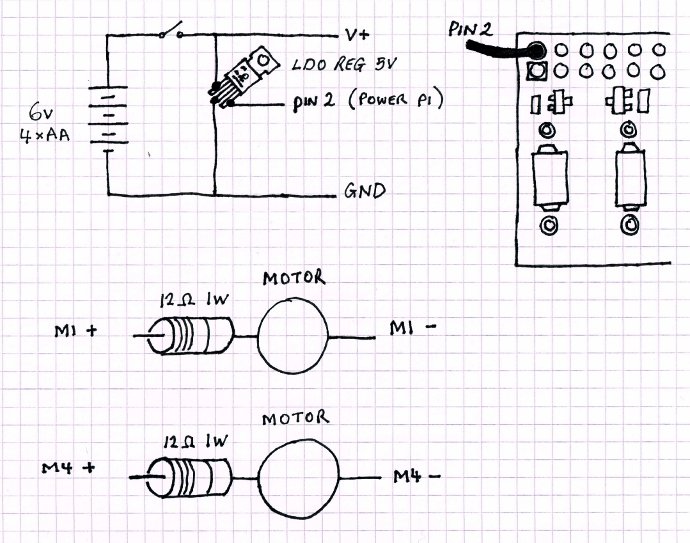

Shown with an optional on/off switch:

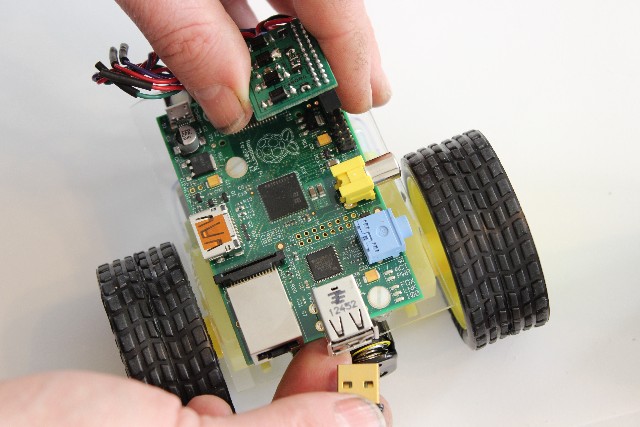
Mount the Raspberry Pi.
Plug in the PicoBorg and the SD card, for testing at this stage we also attach a WiFi module to talk to it.
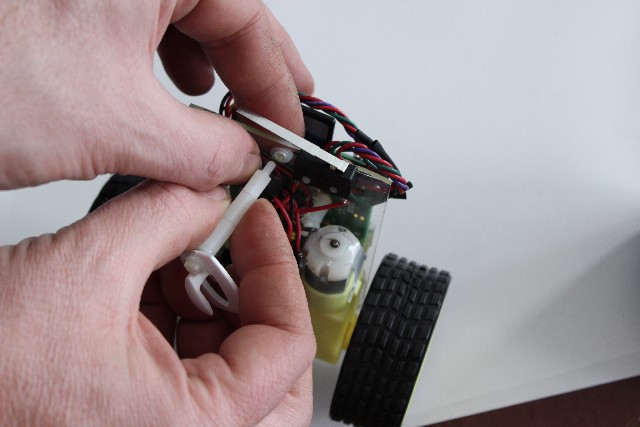
Drill holes for the voltage regulator, and the runner or caster wheel.
Attach the runner or a caster wheel, making sure the acrylic base will be level when sat on this and the two powered wheels.
Leave to allow the glue to dry properly.
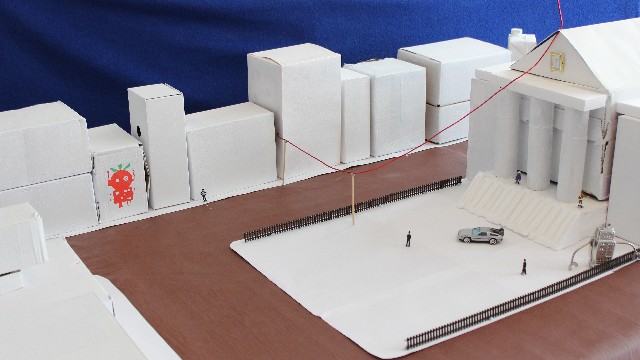
In the meantime you could build an elaborate model world to test it in, as we have done.
Apologies that we didn't have time to paint it or build it to scale.
To test your PiCy we will have to give it some software, for now we will use RemoteKeyBorg as test code.
Make sure RemoteKeyBorgS.py is running on the PiCy, and that it can talk to the network happily.
So, let's continue, and give PiCy his first task to perform.
PiCy is a fully autonomous robot, code for which is available here.
However to start we clearly need a robot to work with. This page is for making your own customised robot.
If you are looking for the PiCy Kit (PiCyPack) it's available here
What you will need
Parts
- A Raspberry Pi
- A PicoBorg
- An acrylic sheet at least 75mm x 120mm
- A pair of motors and wheels make sure you have two!
- A 4 AA battery pack
- A voltage regulator, low drop-out (LDO) 5v 1A or similar
- 4 AA batteries (not rechargeable)
- Hookup wire rated at about 2 or more amps
- Mounting posts for the Raspberry Pi
- A smooth runner or a caster wheel
- Optionally a power switch
- Optionally two pairs of 5V relays
Tools
- A soldering iron
- A cutting tool for acrylic, such as a craft knife or hacksaw
- Glue, preferably two part epoxy resin as you can fix mistakes, super glue bonds better but is unforgiving
- A drill
Build your PiCy
To make the robot's base we will start with an acrylic sheet, we have used 2mm thick sheet which should be available at most hardware stores.You could equally use another material like wood, but we think acrylic goes well with the Raspberry Pi, and it is easy enough to work with.
You will need to cut a rectangular section of 70mm x 100mm from your acrylic sheet, this will be where everything mounts to.
Cut it out carefully with a sharp craft knife.
In order to mount everything together we will use a good glue, like a two part epoxy resin.
You may also want an improvised table or clamp to hold things in place whilst gluing.
Glue one of the motors to the base, then glue in the battery pack (you may need to insert some batteries before gluing depending on your battery pack).
Glue the second motor onto the other side, making sure it is all aligned straight.
Once it has all dried it is time to drill the holes for:
- Motor left +
- Motor left -
- Motor Right +
- Motor Right -
- Motor power
- Raspberry Pi power
- Ground
Drill in holes for Raspberry Pi mounting posts, if you have a Rev 1 Raspberry Pi you will probably need to use double sided tape instead.
Wire in the PicoBorg according to the following wiring diagram. If you are powering the Pi from the 4xAA battery pack, you will need a regulator and to solder the output of the regulator to pin2 on the Picoborg
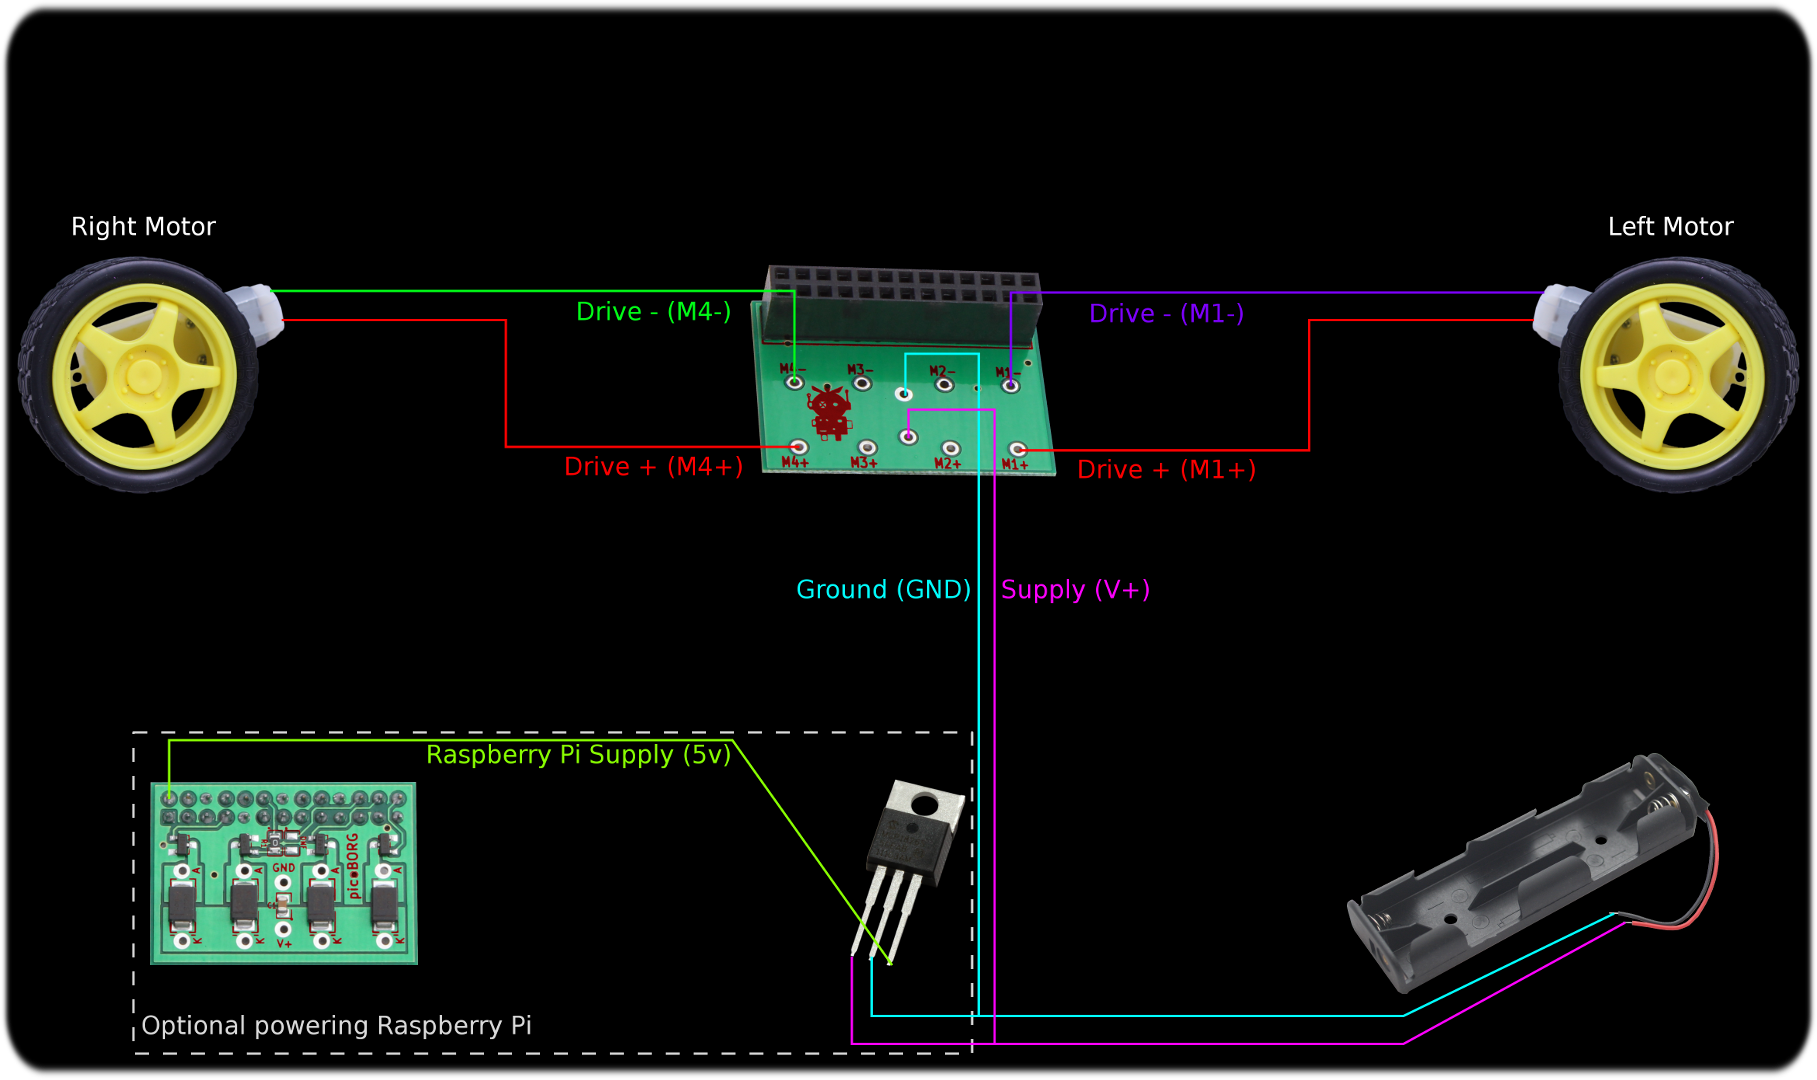
Shown with an optional on/off switch:
Mount the Raspberry Pi.
Plug in the PicoBorg and the SD card, for testing at this stage we also attach a WiFi module to talk to it.
Drill holes for the voltage regulator, and the runner or caster wheel.
Attach the runner or a caster wheel, making sure the acrylic base will be level when sat on this and the two powered wheels.
Leave to allow the glue to dry properly.
In the meantime you could build an elaborate model world to test it in, as we have done.
Apologies that we didn't have time to paint it or build it to scale.
To test your PiCy we will have to give it some software, for now we will use RemoteKeyBorg as test code.
Make sure RemoteKeyBorgS.py is running on the PiCy, and that it can talk to the network happily.
So, let's continue, and give PiCy his first task to perform.

